How to Create a Wallpaper Look with a Stencil
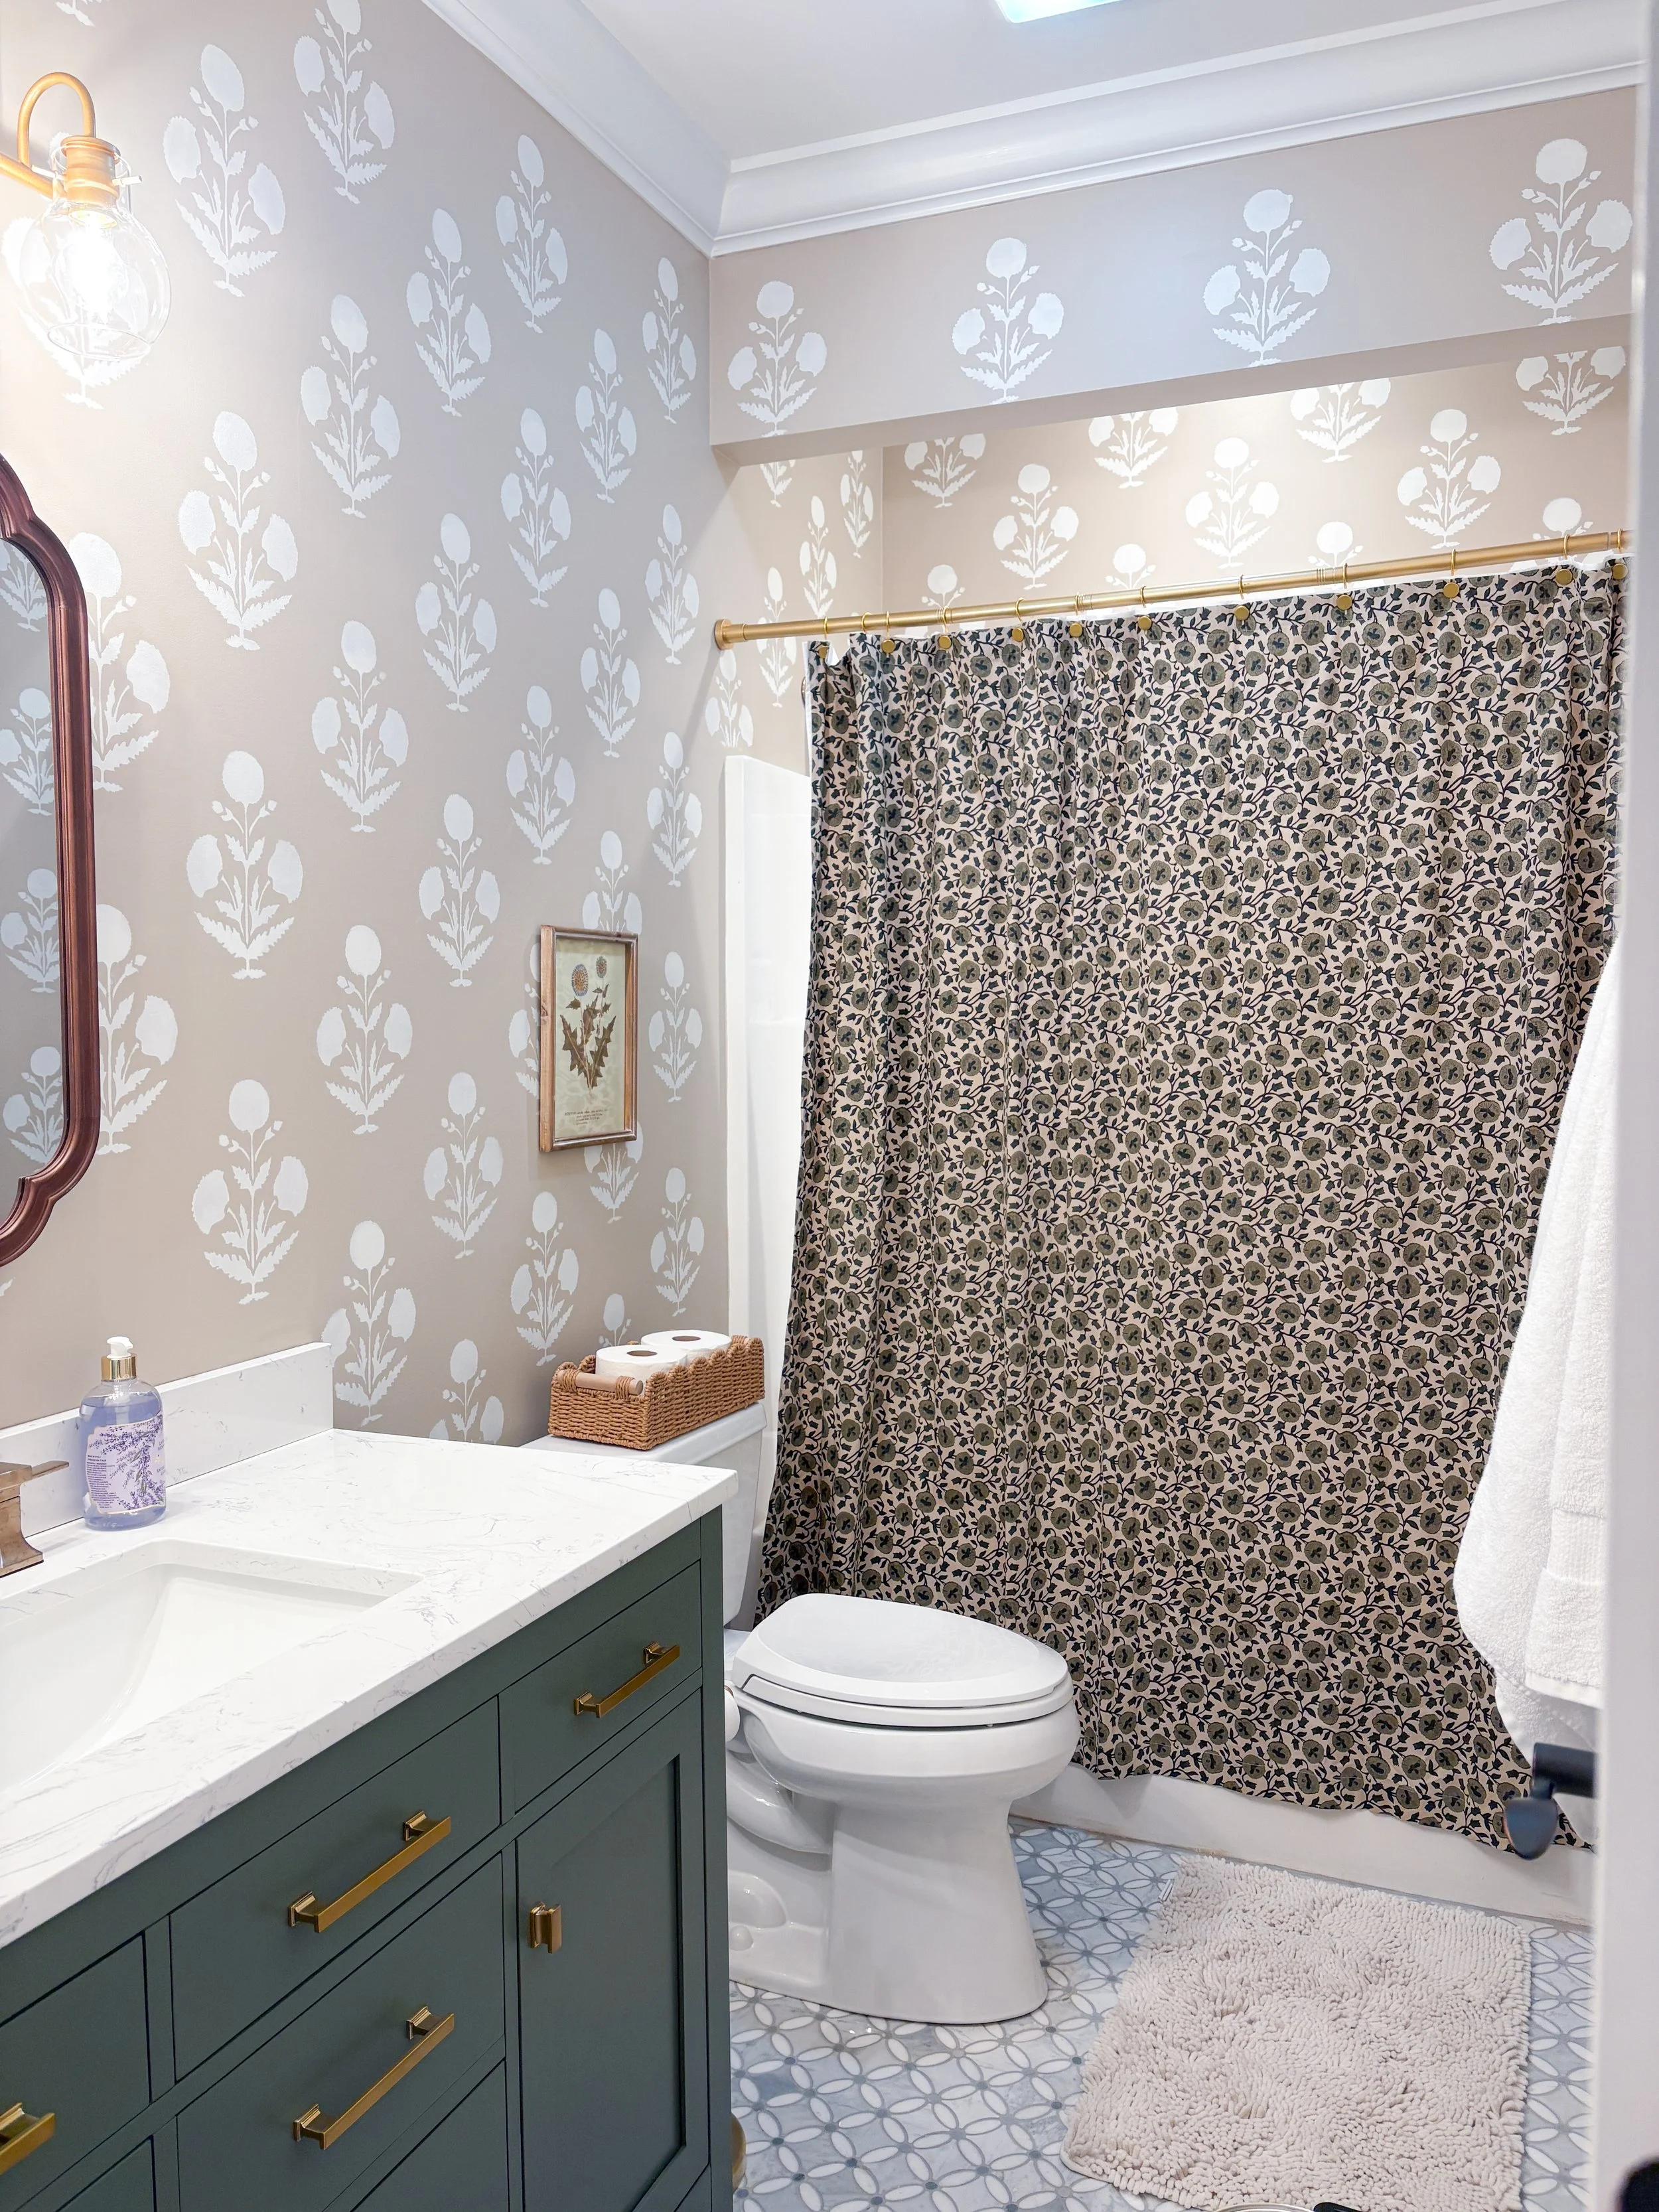
As a self taught designer and DIYer, I recently completed a stunning hall bathroom renovation that perfectly demonstrates how stenciling can deliver amazing results without the premium price tag of designer wallpaper. This project not only created a custom luxury look, but also showcased a cost effective technique that homeowners can master themselves!
Why Choose Stenciling Over Wallpaper?
The decision to stencil rather than wallpaper this bathroom came down to both practical and financial considerations. Quality wallpaper can cost anywhere from $100-250 per roll and professional installation often doubles that expense. In contrast, my entire stenciling project cost under $75 in materials while achieving a custom, sophisticated look that rivals expensive wallpaper!
Bathrooms also present unique challenges for wallpaper due to moisture and humidity. Since my three boys use this bathtub, I was worried about the amount of water splashing on the wallpaper and if it would peel, etc.
Stenciling with a high-quality paint, like Sherwin Williams, eliminated my concerns about peeling, bubbling, or mold growth behind paper materials. This factor plus the cost of wallpaper made me choose stenciling for the bathroom.
Another reason to choose stencil over wallpaper is that stencil is a heck of a lot easier to paint over and change your design! You may need to sand the edges, but you won’t ruin drywall removing wallpaper.
Planning Your Stencil Design
The key to professional-looking stenciled walls is preparation and patience. For this project, I wanted a vintage inspired floral look. Initially, I was only going to paint the walls a solid color and have the floral pattern in the shower curtain be the focal point. However, once I got the bathroom “finished”, something was missing. I needed an extra design element in the room and I knew a block floral design would be beautiful. I chose this turkish poppy block stencil in the “allover” size.
Essential Tools and Materials
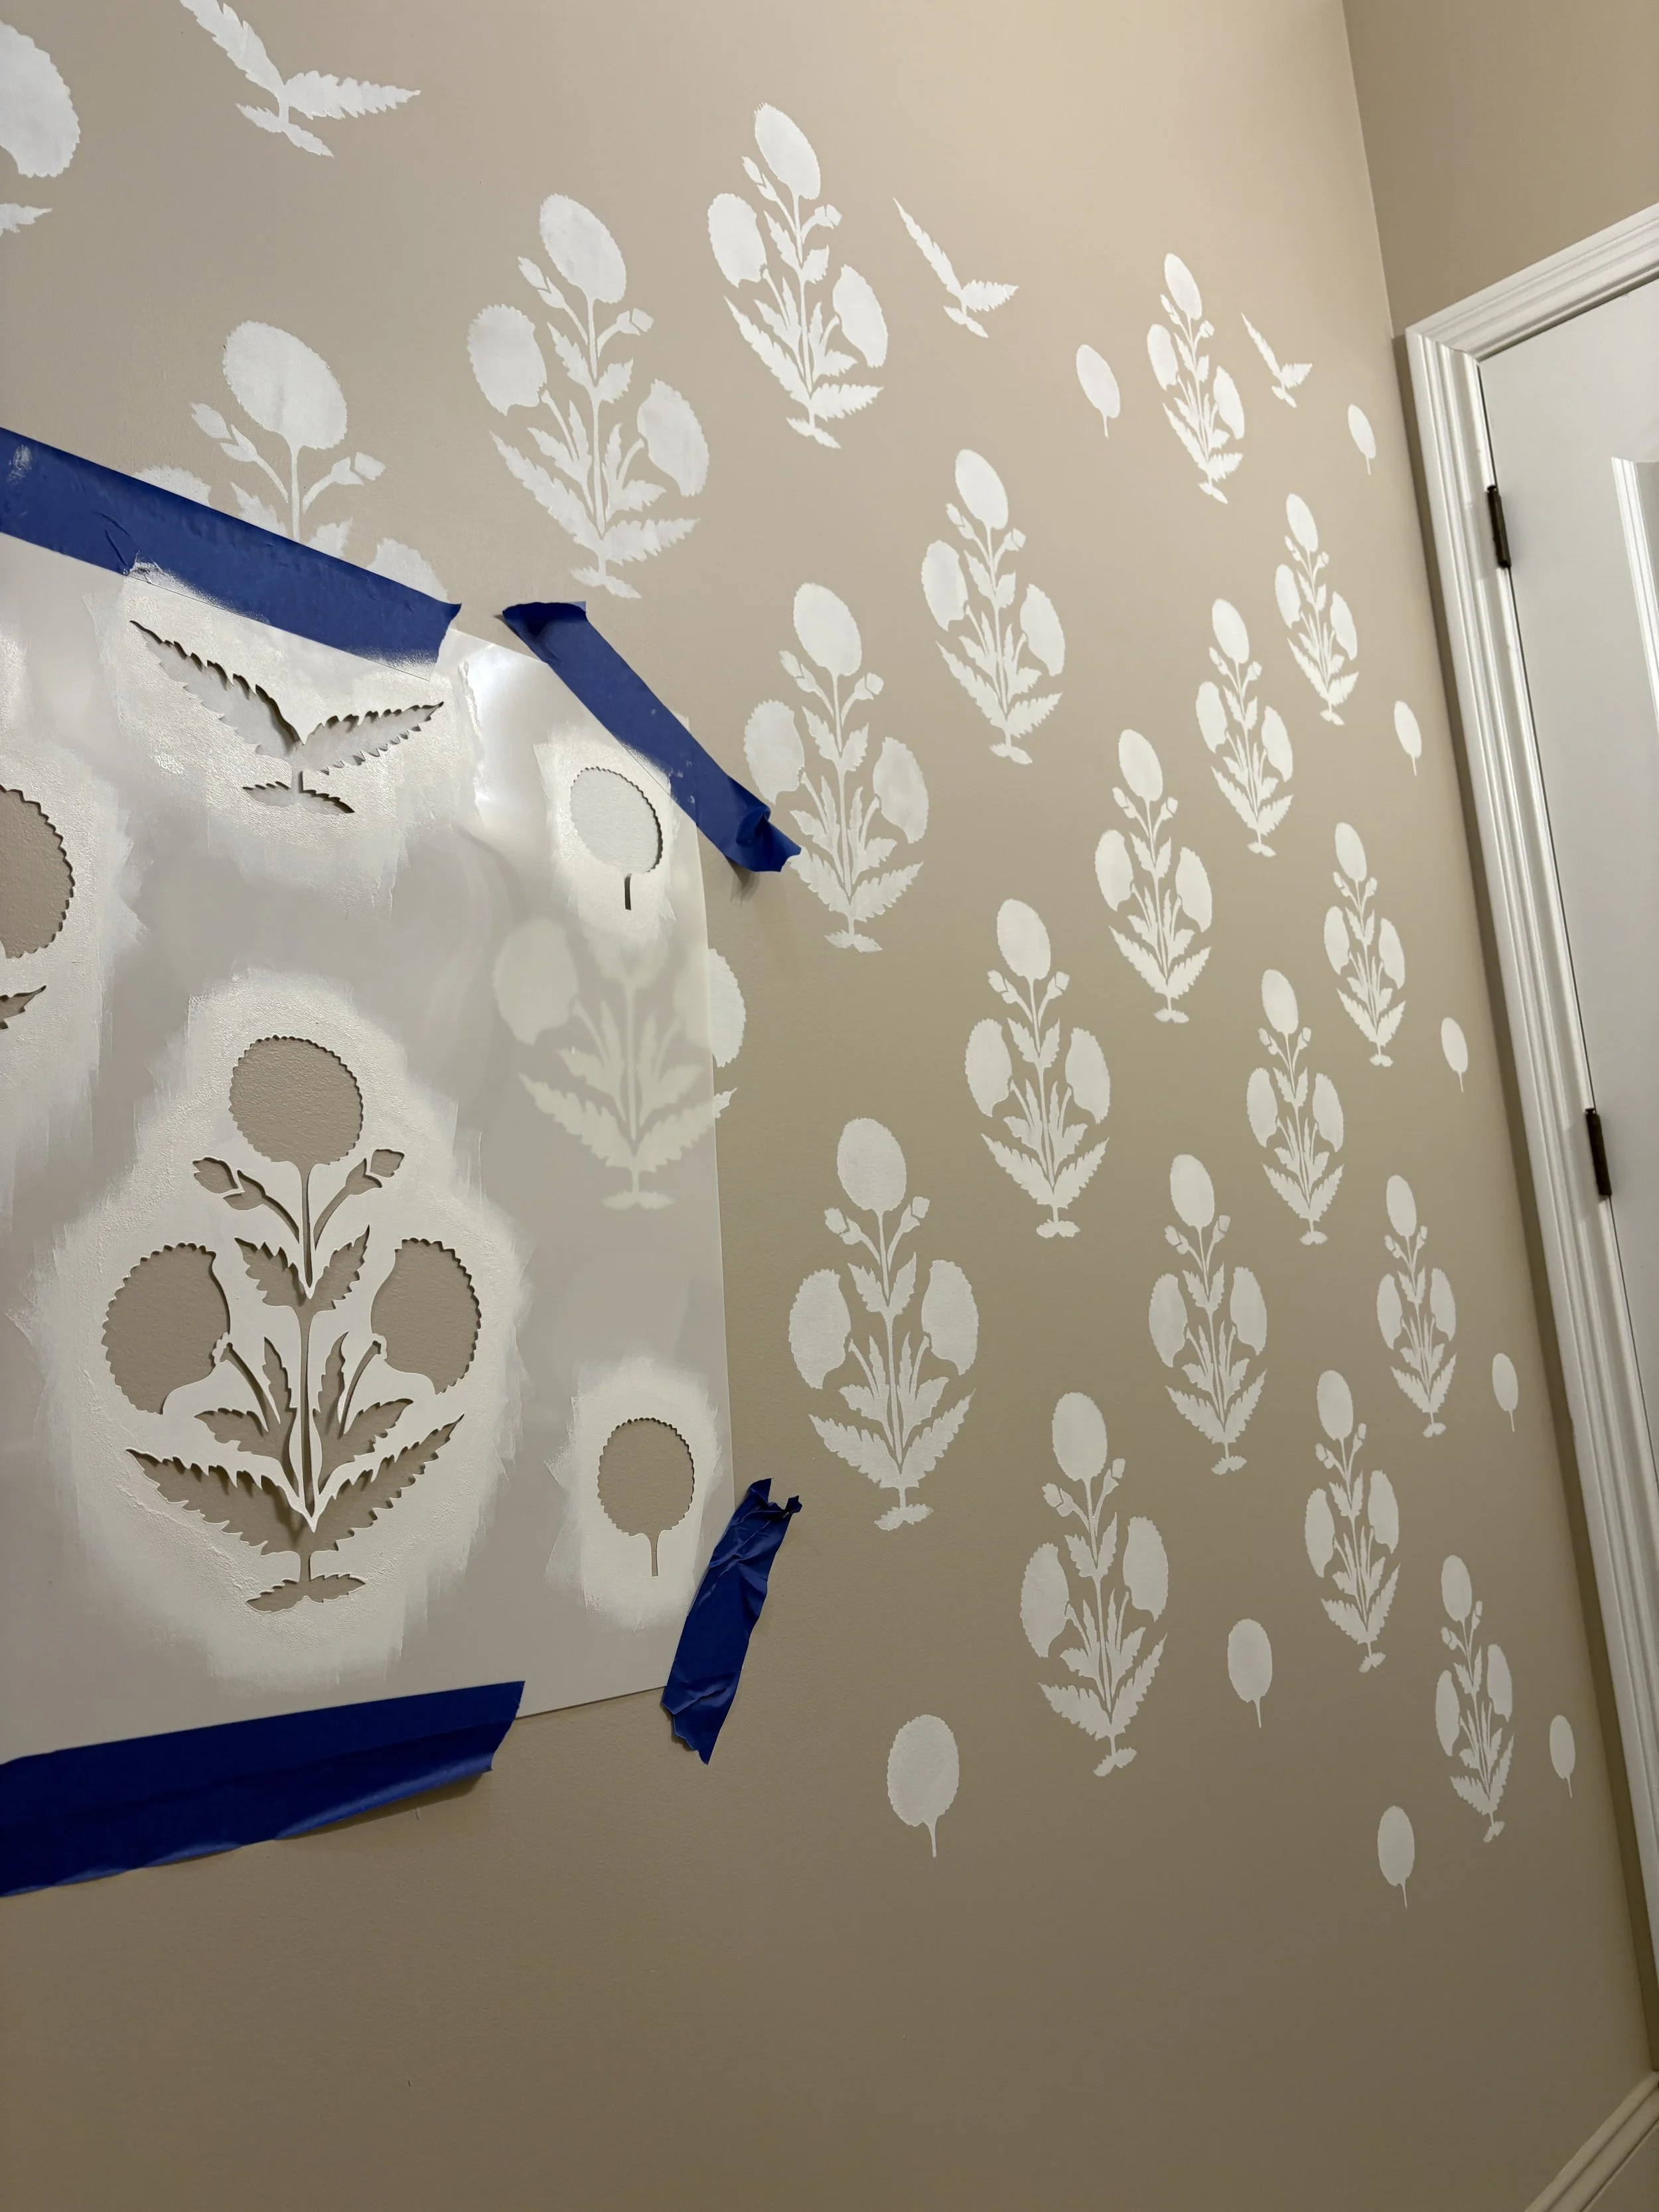
Professional results require the right materials. I have used different stencils before, but the one I chose from Cutting Edge is the best one I have ever used. The stencil gave me crisp edges throughout the entire bathroom. Premium interior paint formulated for high-moisture environments ensures longevity and easy maintenance. I used Sherwin Williams superior paint in satin. Other essential supplies included: high density foam rollers and painter’s tape. I like using small foam rollers, no more than 4-6” wide. Some people recommend a spray to help the stencil adhere to the wall, but I only used painters tape this time.
The Stenciling Process
Stenciling requires a lot of patience and a systematic approach. I established a starting point in the middle of the largest wall, then worked methodically across both ways. Maintaining consistent pressure with the foam roller prevented paint bleeding while ensuring even coverage. The best advice I can give is to go slow and use a very light coat of paint. I like to move right and left of the area I just currently painted so I don’t smear the section I just stenciled. Using a light coat of paint means it dries really fast and you can get more area of the wall painted.
When I got to areas where a full stencil wouldn’t fit, like the door frames and the light fixture, I put that off until the end. When I knew I was finished with the rest of the bathroom, I cut out the full flower so I had a smaller section to manipulate. Near the light fixture, I hand painted around the base. Since this was an afterthought, I didn’t remove the light fixture, but I would recommend that to anyone starting this project.
The entire process took less than two days and I am so happy with the results.
Bathroom wall color is Sherwin Williams “Shiitake”
Stencil color is Sherwin Williams “Greek villa”